How to Disassemble and Clean a Coffee Grinder’s Burrs Thoroughly
Unplug your grinder and remove the hopper to access the burrs, checking your model’s manual for specific steps. Use a soft brush or compressed air to clear coffee grounds, then wipe with a dry cloth. For stuck-on oils, apply a food-safe cleaner like Grindz. Inspect burrs for wear before reassembling, ensuring all parts are dry and aligned. Clean every 1–2 months with heavy use. Oily roasts mean more frequent cleaning-you’ll want to get the details right.
Notable Insights
- Unplug the grinder and remove the hopper to safely begin disassembly.
- Consult the manufacturer’s manual for model-specific steps to access the burrs.
- Remove burrs carefully using appropriate tools, noting alignment marks for reassembly.
- Clean burrs with a dry brush or compressed air, using a food-safe cleaner for stubborn oils.
- Ensure all parts are dry before reassembling, and perform cleaning every 1–2 months.
Why Clean Your Coffee Grinder Burrs?
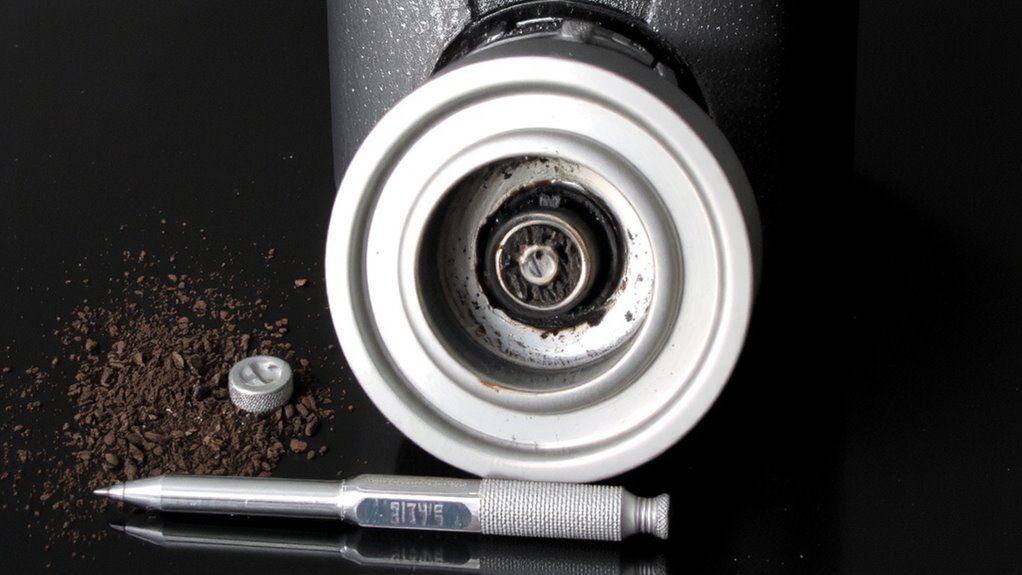
While it might seem like a minor chore, cleaning your coffee grinder’s burrs actually matters more than you’d think. Oils and fine coffee particles build up over time, leading to flavor contamination-your morning espresso might taste stale or off, especially if you switch between light and dark roasts. Residual oils go rancid, negatively affecting the brightness and clarity of your brew. Beyond taste, trapped material accelerates burr degradation; the accumulated gunk causes uneven wear, reducing grinding consistency and shortening the lifespan of expensive burrs. This is especially critical with conical or flat steel burrs found in grinders like the Baratza Encore or Eureka Mignon. Skipping cleaning means risking poor dose accuracy, channeling in your puck, and uneven extraction. Regular maintenance isn’t about perfection-it’s about preserving performance, flavor integrity, and gear longevity. You’ll notice the difference in every cup. For those using high-end models, choosing the right Best Mill Grinders can also impact how easy maintenance is and how consistently your coffee performs over time.
What You’ll Need to Clean Coffee Grinder Burrs
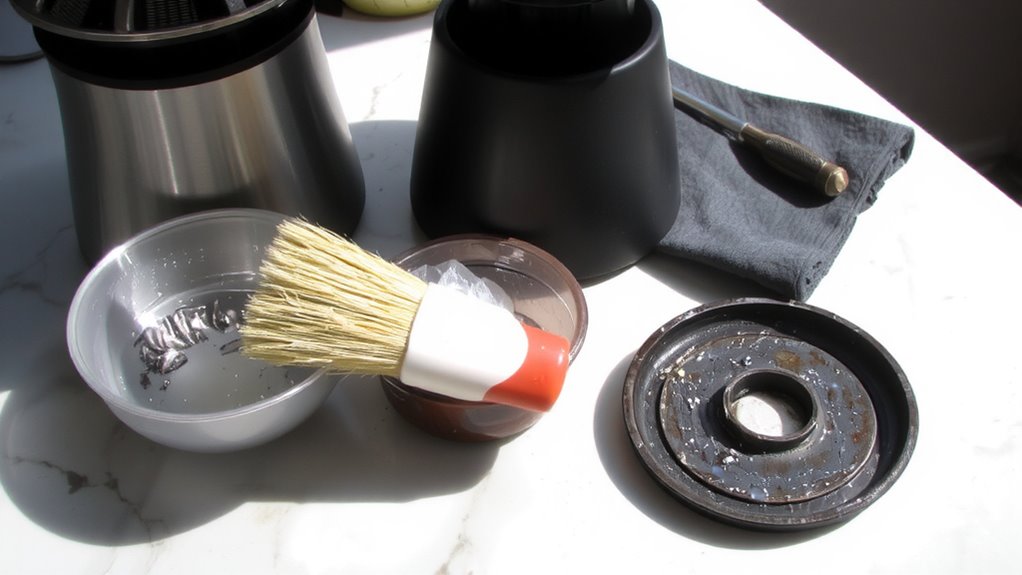
You won’t get far without the right tools on hand, so let’s go over what you’ll actually need to clean your grinder’s burrs properly. Start with basic brushes-like a clean toothbrush or a dedicated grinder brush-to remove coffee grounds and reduce static buildup. Use compressed air to blow out hard-to-reach spots, but avoid moisture. For sticky coffee oils, go for a food-safe grinder cleaner, such as Grindz or Urnex Grunge Off-don’t use water or soap, since they can damage metal parts. A soft microfiber cloth helps wipe down exposed surfaces. If your grinder has removable burrs, have a clean towel ready to set parts on. Avoid metal tools that could scratch surfaces. Some people use uncooked rice, but it’s risky and may leave residue. Stick to proven tools that target coffee oils safely and reduce static buildup without harming components. Proper tool selection can make a significant difference, much like choosing the right Best Coffee Tamper Picks ensures optimal extraction in your daily brew.
How to Disassemble Your Grinder for Burr Cleaning
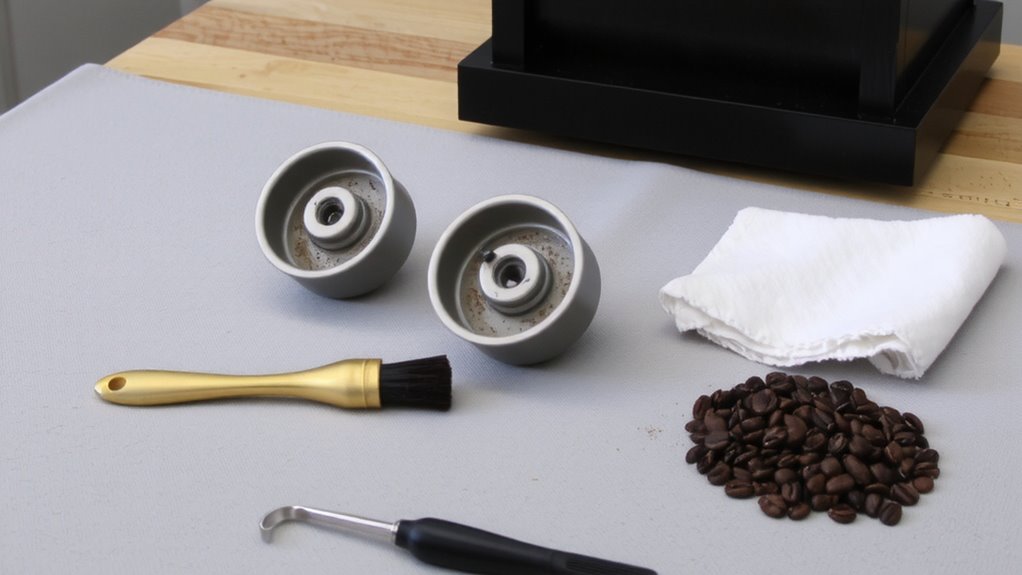
How do you safely get to the burrs without damaging your grinder? Start by unplugging the unit-safety first. Check your model’s manual for disassembly steps, as designs vary between brands like Baratza, Fellow, or 1Zpresso. Most grinders require removing the top burr carrier or loosening a central screw. Use the right tools to avoid stripping parts. Pay attention to torque settings; overtightening during reassembly can warp threads or affect grinder alignment later. Keep track of each piece’s order and orientation. Manual coffee grinders often feature precision burr assemblies that require careful handling to maintain grind consistency.
| Step | Tip |
|---|---|
| Unplug grinder | Prevent accidental startup |
| Remove hopper | Gives access to upper burr |
| Note grinder alignment marks | Guarantees proper reassembly |
Following these steps keeps your grinder in top shape and avoids unnecessary wear.
Remove and Clean the Burrs
The burrs are the heart of your grinder, and keeping them clean guarantees consistent grind quality and flavor in your coffee. After disassembling your grinder, carefully remove the burrs according to the manufacturer’s instructions-some models use screws, others a locking nut. Handle them gently to avoid damaging the cutting edges. Use a soft brush or compressed air to remove coffee fines, then wipe with a dry cloth. For stuck-on oils, a mild, food-safe cleaner works, but never soak metal burrs. Plastic burrs can crack if cleaned aggressively. Check for wear or flat spots; damaged burrs hurt performance and hurt grinder calibration. Misaligned or warped burrs affect burr alignment, leading to uneven grinding. Replacing worn burrs restores consistency. Always note how parts fit during removal-it makes reassembly and proper calibration easier. Keep your tool kit ready; small changes impact grind quality more than you think.
Dry and Reassemble Your Grinder
After cleaning, make sure every part is completely dry before reassembling-any moisture left on the burrs or inside the grinder can lead to clumping or rust over time, especially with steel components. Use gentle drying methods like air drying on a clean towel or using a lint-free cloth. Avoid heat sources like ovens or hairdryers, as they may warp plastic or damage seals. Once dry, follow reassembly tips: align the burrs properly, don’t force parts, and guarantee the grinder is turned off during reassembly. Refer to your model’s manual for precise fit.
| Method | Best For |
|---|---|
| Air drying | Thorough, safe drying |
| Lint-free cloth | Quick surface moisture |
| Hairdryer (cool) | Stubborn damp spots |
How Often Should You Clean Coffee Grinder Burrs?
Generally, you’ll want to clean your coffee grinder’s burrs every 1 to 2 months if you use it daily, since oils from the beans build up over time and can turn rancid, affecting flavor. This regular maintenance schedule helps preserve coffee freshness and guarantees consistent extraction. If you brew multiple times a day or use oily, dark-roasted beans, consider cleaning every four to six weeks. Lighter roasts produce less oil, so you might stretch cleaning to every three months with occasional use. Neglecting your maintenance schedule risks clogging the burrs and dulling their precision, leading to uneven grounds. For best results, pair deep cleaning with routine brushing after each use. Timed correctly, a thorough burr cleaning takes under 20 minutes. Sticking to this schedule keeps your grinder performing reliably and extends its lifespan, making it a small effort with measurable returns in taste and performance.
Avoid These Common Burr Cleaning Mistakes
While it’s tempting to speed through cleaning your grinder, rushing the process or using the wrong methods can do more harm than good. Never use water on motor parts-moisture can damage electrical components and lead to failure. Instead, use a dry brush or compressed air to remove coffee oils and residue. Avoid over tightening parts when reassembling; doing so can strip threads or cause burr misalignment, affecting grind consistency. Hand-tighten components snugly, but don’t force them. Don’t use harsh chemicals or abrasives on burrs, as they can wear down the metal surfaces. For most grinders, like the Baratza Encore or Fellow Ode, manufacturer-recommended cleaning tools work best. Regular dry maintenance prevents buildup without risk. If you need to deep clean, use grinder cleaning tablets designed for the purpose. Let all pieces dry completely before reassembly. Skip shortcuts-they might save minutes now but cost you in performance and longevity later.
On a final note
You should clean your grinder’s burrs every 1–2 months, or more if you use oily beans or notice flavor changes. A thorough cleaning removes stale coffee oils that cause bitterness. Just disassemble carefully, brush out debris, and avoid water unless the manufacturer says it’s safe. Never use rice-it’s ineffective and risky. Dry parts fully before reassembling. This simple maintenance keeps your grinder working accurately and your coffee tasting fresh.